Concrete Grinders – What Do You Need To Know?
What Is a Concrete Grinder?
A concrete grinder is a floor preparation machine with one or more rotating discs fitted with abrasive segments. These discs wear down the top layer of concrete to remove coatings, smooth rough patches or polish surfaces to a high sheen. Grinders vary in size from handheld units suitable for edging to large walk‑behind machines used to prepare slabs in factories or warehouses. Some feature planetary gear systems, where multiple smaller heads rotate around a larger disc, giving an even finish over a wide area. Others are single‑head units that are more compact and easier to manoeuvre.
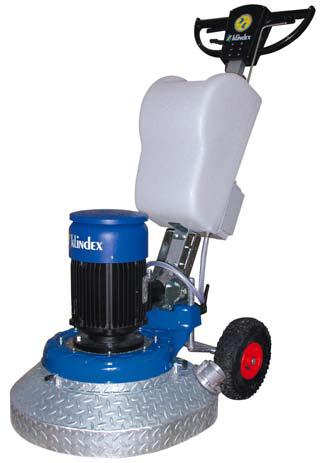
“Levetec Grinder” by Wayne Wheller. Source: Wikimedia Commons. The creator has released this image into the public domain
Uses and Applications
For homeowners, concrete grinders are invaluable for several tasks:
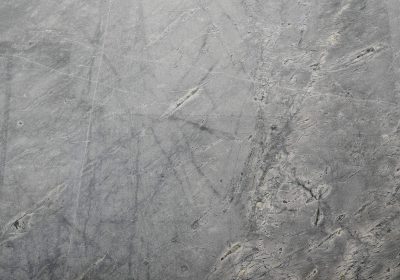
- Surface preparation for coatings: If you plan to apply epoxy paint, sealers or overlays to a garage or patio, the existing surface must be clean and slightly rough to help the new material bond. A grinder removes old paint, adhesives or sealers and creates a textured profile that improves adhesion.
- Levelling uneven slabs: Outdoor areas, driveways and interior concrete floors sometimes have high spots caused by poor pouring or settlement. A grinder can shave down these high spots to create a level surface, preventing trip hazards and allowing for better fitting of tiles or flooring.
- Polishing concrete: Polished concrete floors are popular for their modern look and low maintenance. A planetary grinder equipped with progressively finer diamond polishing pads can transform a dull slab into a glossy finish. The process typically starts with coarse grit (around 30 or 50) to remove imperfections and gradually moves through medium and fine grits (100, 200, 400 and 800 or higher) for a mirror‑like shine.
- Removing trip hazards: Garden paths or small slabs that have become misaligned can be ground down to remove trip edges. This is particularly helpful if you have tree roots pushing up pavers or slabs.
- Creating decorative finishes: Homeowners experimenting with concrete countertops or custom benches can use small grinders to hone edges or expose aggregate for a decorative effect.
What to Look for When Hiring
To choose the right concrete grinder for your project, consider the following factors:
- Type of surface and area size: Large walk‑behind grinders are efficient on big, open areas such as garage floors or driveways. For tight spaces, edges or vertical surfaces, a handheld grinder or smaller single‑head machine is more appropriate.
- Power source: Grinders can be electric, petrol or battery powered. Electric models are common for indoor use because they produce no fumes. Ensure that you have access to the correct voltage and that your power supply can handle the machine’s demand. Petrol units are powerful but should be used outdoors because of exhaust gases.
- Dust extraction: Grinding concrete produces fine silica dust, which is hazardous when inhaled. Hiring a grinder with an integrated dust shroud and connecting it to a vacuum or dust extractor significantly reduces airborne particles. Some companies include vacuum systems in the hire package.
- Disc size and speed: Disc diameter affects productivity; larger discs remove material faster but may be harder to control. Variable speed controls are useful because they let you adjust the rate to suit the task—slower for fine finishing and faster for material removal.
- Attachments: Make sure the hire company supplies the correct diamond segments or polishing pads. Coarse grits are needed for removing coatings or heavy grinding, while fine grits are used for polishing. Ask for advice on which segments to hire and whether you’ll need a set of progressively finer pads if polishing.
- Weight and ergonomics: Heavier machines often cut more aggressively but may be difficult to move, especially if your workspace involves steps or slopes. Some grinders have adjustable handles or counterweights to reduce operator fatigue. Check if the hire company offers training on proper handling.
Tips for Using a Grinder
• Prepare the area: Remove furniture, sweep away debris and check for embedded objects (e.g., nails or screws) that could damage the grinder. Cover nearby items and openings to prevent dust migration.
• Use personal protective equipment (PPE): Wear a dust mask or respirator rated for silica, safety glasses, ear protection and sturdy boots. Gloves help with vibration and protect your hands from diamond segments.
• Start with a coarse grit: If removing coatings or levelling, begin with a 30‑ or 50‑grit segment. Move the machine slowly and evenly, overlapping passes to avoid creating ridges.
• Switch to finer grits gradually: If polishing, progressively switch to finer grits (e.g., 100, 200, 400) after each pass. Clean the surface between grit changes to prevent scratches from leftover particles.
• Control dust: Keep the vacuum running and periodically check that the dust shroud is sealed against the surface. If using water for polishing (wet grinding), control slurry run‑off and clean up immediately.
• Take breaks: Grinding can be physically demanding and noisy. Take short breaks to inspect your progress and adjust your technique.
• Clean the machine: At the end of the hire, clean the grinder and return it in good condition. This may avoid additional fees and ensures the machine remains in good working order.
Example Scenario
Imagine you’re re‑doing your garage floor. The slab is stained and slightly uneven from years of use. You plan to apply a two‑part epoxy coating, but first you need a clean, level surface. Hiring a single‑head electric grinder with 250 mm discs is a good choice. The hire company supplies coarse diamond segments and a dust extractor. Over two days, you remove old paint, grind down high spots and vacuum dust. After cleaning the slab thoroughly, you follow up with a medium grit to refine the texture. With minimal disruption to neighbours (electric grinders are less noisy and produce no fumes), your floor is ready for the epoxy coating, and you avoid the expense of paying a contractor to do the prep work.